
The Wireshark Q&A trace file sharing tutorial
In many of those cases the person asking a question on the Wireshark Q&A site posts screenshots or ASCII dumps of the packet list, which is very hard to work with when you’re trying to help. It is much easier if you can get a PCAP or PCAPng file instead, but there are two major problems with that: how to share the file, and how to remove sensitive information first.
Even thought the Wireshark Q&A web site is mainly intended to ask and answer questions regarding Wireshark usage and development (including tools like tshark, editcap, mergecap etc.), many people also use it to ask questions about network capture analysis problems or how-to’s. And one of the most common comments to a question text is usually “can you provide a trace file” (a.k.a. pcap, capture file, binary log, etc.), so that Wireshark can be used to look at the problem. Unfortunately, in quite a few cases the answer is “sorry, can’t do that, it contains sensitve information” or “no, it’s from a customer, I can’t share it”. Which is a big problem, because it makes helping the person asking the question much harder or even impossible.
Basically, there’s three steps required to share a trace file:
- sanitize/anonymize the trace and remove all sensitive information
- verify that the sanitization results are satisfactory
- share the trace online
All three steps also apply if you’re going to share a trace file with a vendor investigating a problem with one of his devices (e.g. a Firewall), even though the last step is often not that big of a problem – you can email the trace, or put it on an FTP server you own, etc.
Step 1: Sanitize the trace
Sanitizing a trace file used to be very complicated a couple of years ago, since it required using command line tools with tons of parameters that often wouldn’t get you satisfactory results without fine tuning or running it multiple times. I even had to combine tools in a lot of cases to get what I needed, and they would often simply refuse to work on traces that had more than just plain Ethernet – IP – TCP/UDP/ICMP layered frames. Now, there’s TraceWrangler, making it relatively simple to perform sanitization, even though it can’t do magical things (yet 🙂 ). Unfortunately for some of you, TraceWrangler only runs on Windows, or Linux when using WINE.
So if you don’t have TraceWrangler yet, download the 32bit or 64bit zip file (64bit is recommended, unless you only have a 32bit OS), unpack it anywhere you want and run tracewrangler.exe. This is what you should see after closing the beta warning popup (which only shows up on the first run):
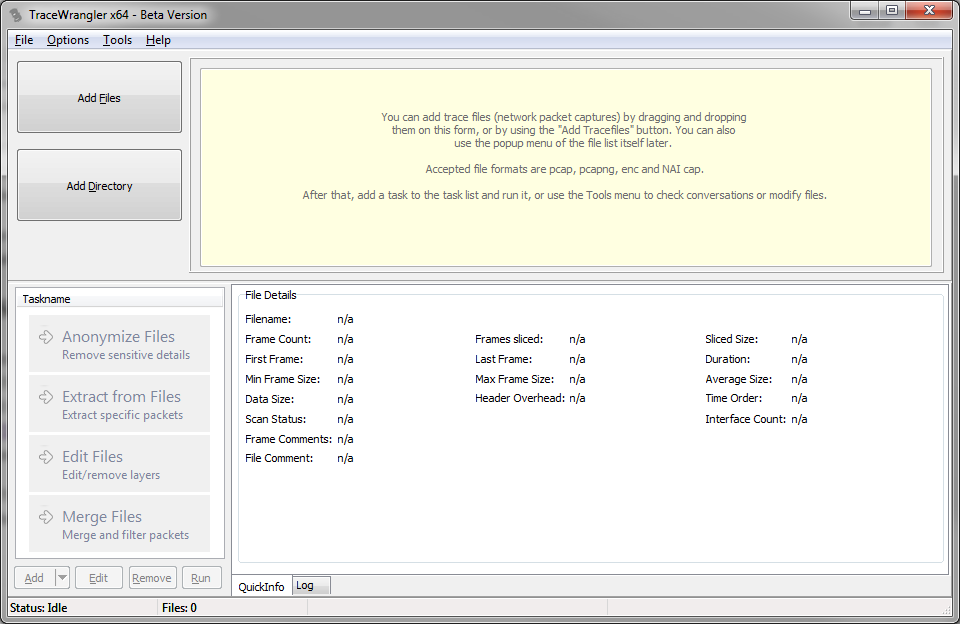
Figure 1: TraceWrangler Main Window after start
Okay, now the next step is to add the capture file you want to sanitize. You can either use the main menu, the “Add File(s)” button on the left, or simply drag & drop the pcap/pcapng file icon from your file explorer anywhere on the program. As soon as at least one file has been added to the file list the task buttons on the lower left pane will be enabled.
Click the button “Anonymize Files” to add a new task to be performed on the trace files in the file list. A new task settings dialog opens, allowing you to specify how the sanitization shall be performed:

Figure 2: Settings for trace file sanitization
The single most important setting is found right there on the “Payload” page, and it is the checkbox for “Remove all unknown layers”. As long as that box is checked TraceWrangler will cut everything away that it can’t identify, and that is of critical importance. If you uncheck this box, sensitive information may be exposed after the task has run – simply because what TraceWrangler doesn’t know it can’t sanitize. So make sure that this setting is checked unless you know exactly what you’re doing.
By default, TraceWrangler will randomize all VLAN IDs as well as Ethernet, IPv4 and IPv6 addresses. It will also remove all domain names, e.g. carried over ICMPv6 or DHCP (DNS isn’t covered yet, which means that DNS payload is completely cut away by the “Remove all unknown layers” setting – this is why that setting is that important!).
Under most circumstances those default settings should be fine: TraceWrangler will give you a new trace file that contains no TCP or UDP payloads except DHCP and RTPS, and all addresses are changed as well.
Close the settings dialog with the “Okay” button to add the task to the task list:
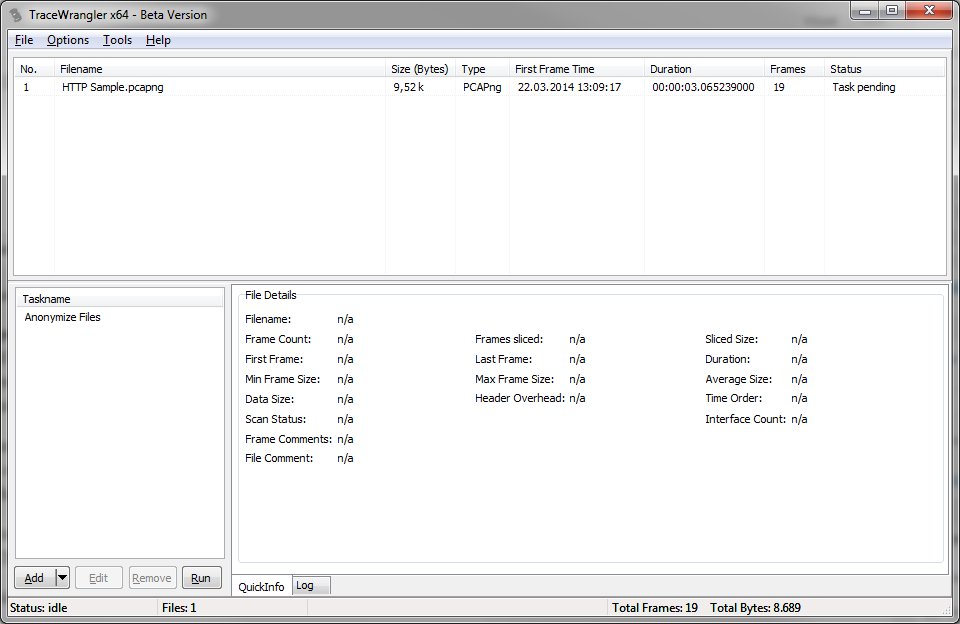
Figure 3: Trace file and anonymization task added
The final step is to click the “Run” button at the bottom of the task list to run the anonymization task on the file. If you didn’t change the output settings of the task you’ll end up with a new file with a “_anon” suffix, e.g. “HTTP Sample_anon.pcapng” in my example shown above.
Sanitizing multi point captures
If you need to sanitize multiple capture files taken at the same time (e.g. one at a client and one at a server) you should add them to the file list together and process them with just one anonymization task. That way the address/port replacements will be consistent across the files. If you run a task on each single file the address and ports may get randomized to different values instead, which makes matching the packets a lot more complicated than it needs to be.
Troubleshooting TraceWrangler
It can happen that you end up with an error message like this:
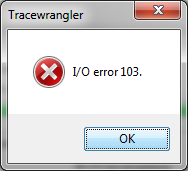
Figure 4: TraceWrangler IO Error 103
This error message basically only happens if TraceWrangler wasn’t allowed to write the new file. The most common reason for that is that you placed the original trace in a location that is protected by the Windows OS, e.g. C:\ or C:\Program Files\. To solve the problem, move the trace file to a writable path, e.g. your desktop. Or set a different output directory in the anonymization task settings.
If you see other problems (e.g. runtime errors or similar crashes), try the latest development build available at https://www.tracewrangler.com/download/automated/ which may contain bug fixes helping in your case.
Step 2: Verifiy the results
After the sanitization is complete you need to check the results to make sure everything looks fine. This may seem a little intimidating if you’re not used to reading trace files, but let’s take a look at my example. This is the original file:
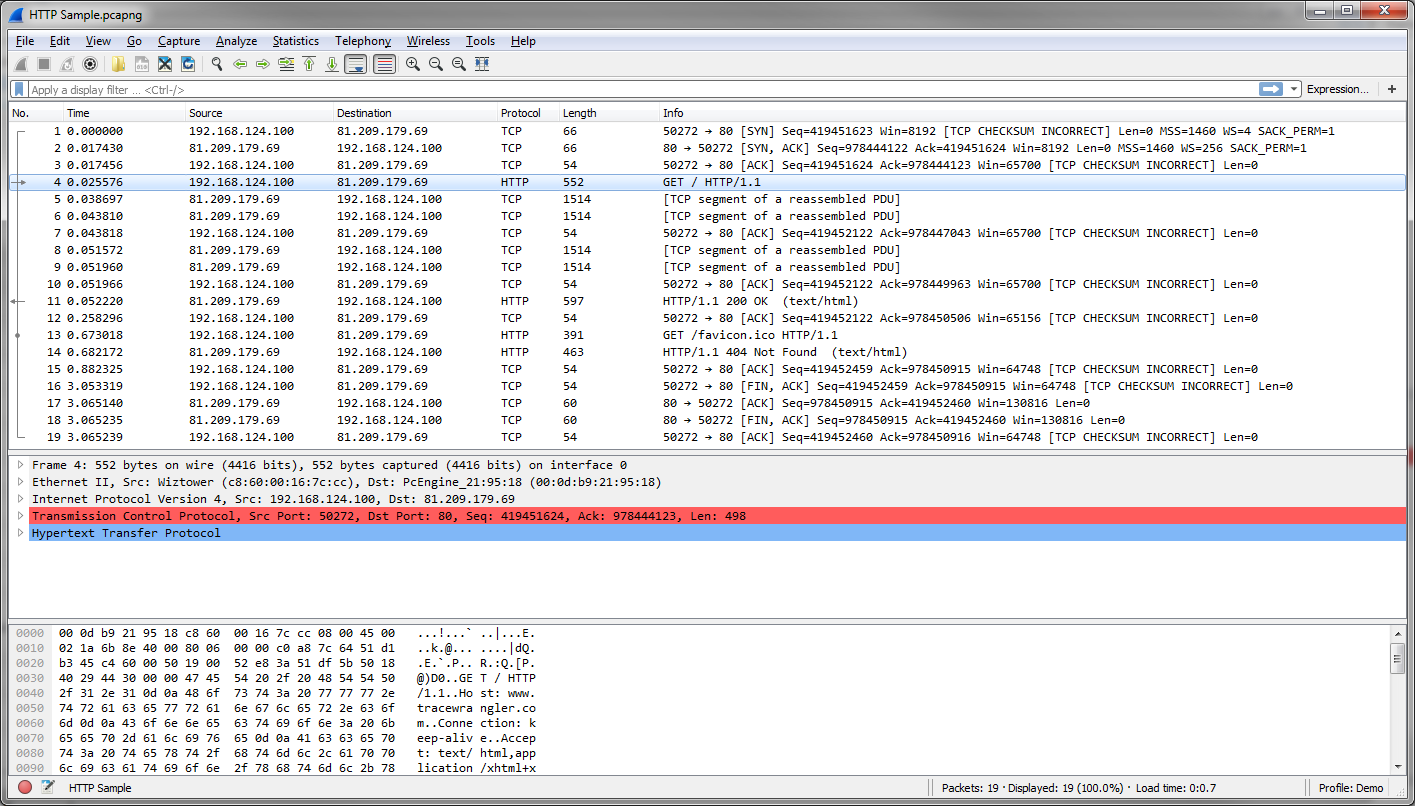
Figure 5: Example trace before sanitization
As you can see there’s HTTP requests in there and some readable content in the hex pane at the bottom. Now lets check the sanitized file:
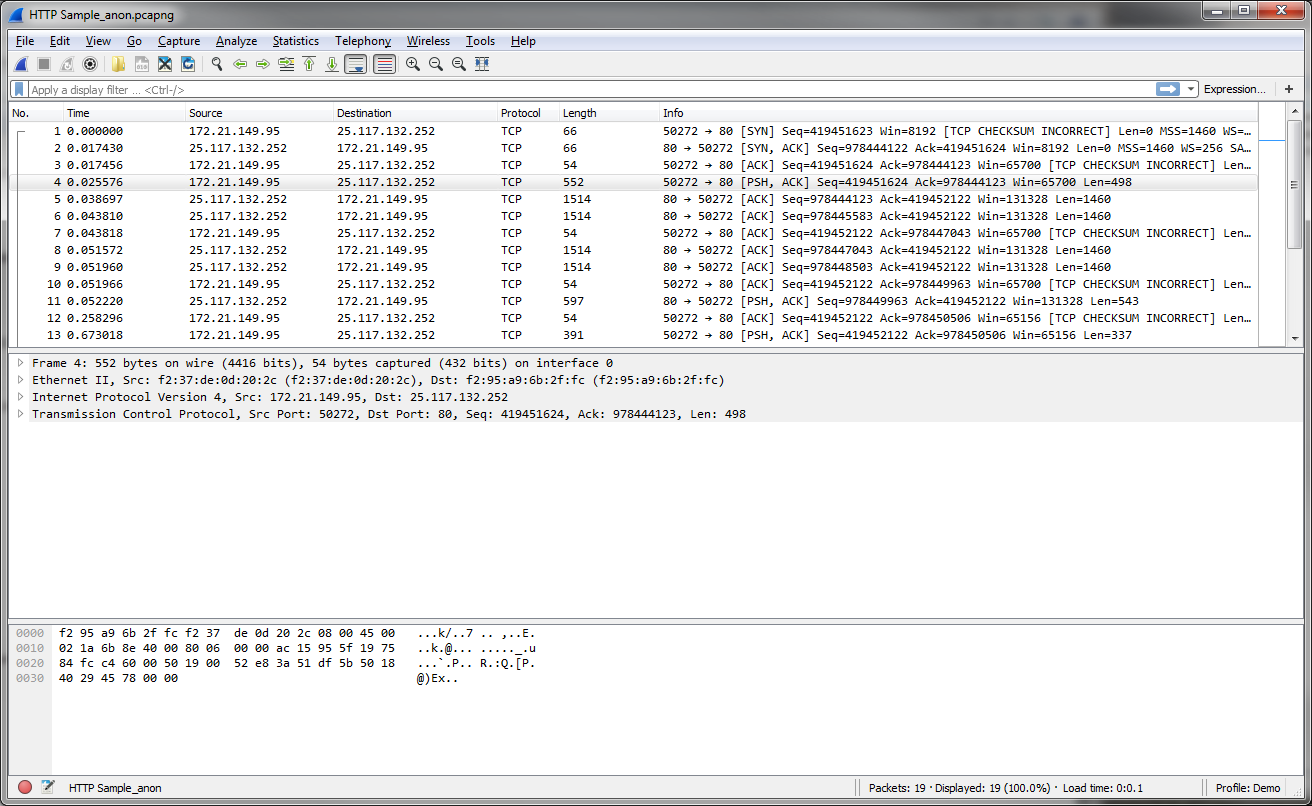
Figure 6: Example after sanitization
All IP and Ethernet addresses have been randomized. All ports are kept the same as they usually do not pose a big security risk and are not randomized by default. The most important thing is that you can see that all the HTTP stuff was completely removed – you don’t see the HTTP information like GET requests in the packet list anymore. And the readable bytes in the hex pane are gone, too.
So you may now wonder how good a trace like that still is for a network analyst. Well, it’s useless if the problem is with HTTP, obviously. But most problems are related to timings and TCP behavior (e.g. Sequence numbers, packet loss, acknowledges etc.), and all of that is still 100% intact.
So you should be able to do a visual inspection or use the “Find” feature in Wireshark to verify that specific sensitive information has in fact been removed. Otherwise tune the task parameters and run it again until you like the result.
Step 3: share the trace online
If you’re going to ask a question on the Wireshark Q&A page it allows attaching files to a question since the move to the new platform in late 2017. If that doesn’t work for you, there are a couple of options to share a trace publicly so that people interested in helping you can access it. If you have Dropbox, Box, Google drive or any other cloud service you can put the files there and share a link to it. The other option is to use Cloudshark. Unfortunately the Cloudshark guys have removed the option to upload trace files anonymously, so you need to register for a free trial account to be able to upload your file. It doesn’t take long though, so usually it’s the best option.
Hi Jasper,
Thanks for the article!
Just wanted to add a couple of thoughts regarding trace sharing in addition to the article.
1. Always provide an information about exact capture point. “On the access switch closest to a client, using SPAN port”; “On the client itself” etc.
People often don’t realize how important it actually is and I rarely see that info in original question.
2. Network diagram is wanted! If you don’t know full diagram (ISP is involved or some other 3rd party) – provide only the part you know. Better to provide diagram than just a description! “Client is connected to a switch, the switch is connected to another switch, then there is a router…” This is cool, but.. not so 🙂
3. Try to keep IP addressing schemes logical. Keep private addresses private, pay attention to subnet boundaries. Or explicitly mention all the changes you’ve made. Or write down new addresses to a diagram (see p.2).
Examples:
–you want to change client’s IP 50.50.50.50 to 10.10.10.10? Cool, but now an analyst could think that there is a NAT device involved.
–there is a conversation between 192.168.1.1 and 192.168.1.2 with 0.7s RTT? Why is that? L2VPN? Faulty switch? Oh, it’s just anonymized trace, endpoints had totally different public IP’s before. Satellite link.
This is even more important if you do multiple points capture. Keep same addresses the same! 10.10.10.10 and 192.168.1.1 in two anonymized captures actually were 50.50.50.50 and the same 50.50.50.50 before anonymizing? No, just don’t do that!
4. As Jasper has already mentioned, don’t change ports unless it’s really needed. Strange countless TCP conversations to server’s port 43675? Malware? No, these were encrypted SNMPv3 probes being sent to port 161. Nothing special.
So, overall: try to make minimal neccessary changes that you can’t avoid. Anonymizing could easily mean distortion. Distortion could easily mean wasted time.
Cheers,
Vladimir
Thanks, Vladimir, good points. On point 3 I have to add that TraceWrangler will keep private IPs private and public IPs public by default anyway, unless you change the “Private range mode” randomization setting to “full address range”. So no need to worry in most cases. And if you run TraceWrangler on two traces using the same task, the replacements will stay consistent as well.
Generally speaking: the TraceWrangler default settings are configured to provide reasonable sanitization while keeping important relationships intact. So unless settings are modified, most of your concerns are handled automatically 😉
Jasper,
That’s good to know, thanks!
Jasper, thank you for providing us the means to remove sensitive information from trace files. Very kind of you to take the time to write this as it will be very useful.
Can you tell me if this tool also anonymizes information for trace files that contain wifi information? Is there a size limitation on the file as I received the message ‘Access violation at address 000000000F33E9D in module “TraceWranger.exe” Read of address 000000000000010.” It only anonymizes wcap files and not pcapng files, correct?
I recorded all this in case you want to look at the errors for troubleshooting purposes. 🙂
I hope when you respond, I get an email as I’m not sure how else to subscribe to your site for updates.
Thanks in advance for your time!
Hi Hang,
Thanks! TraceWrangler is not able to work with the WiFi layers at this time, but I’m working on it. The file formats it reads are pcap, pcapng, enc and cap (the last two being the old Sniffer Pro formats). The crash you saw is annoying but probably something related to it being a WiFi file.
Thank you for responding and also for sending me an email, Jasper, as I would not have known you responded. Is there a way for me to get alerts when you do respond?
So the other issue I had was that I tried to sanitize two pcapng files, but only one worked.
I will send you en email of the recording of me using the product so you can see if it’s user error or not. 🙂
Hi Jasper, it would be great if can update the post with the following feature description:
At the new Wireshark Q&A site is now possible to share very small pcap files directly. I think.
Done 🙂
Hi Jasper,
thanks for the interesting article.
There are indeed not much tools on the market that support anonymizing of Wireshark captures. Nevertheless, our VoIP Analyzer Tool can convert Wireshark captures to anonymous Wireshark captures.
The tool was original developed to make any Wireshark VoIP captures anonymous on application level.
We can overwrite SIP Digest credentials, SIP user names, SIP phone numbers, IP addresses and RTP voice samples.
However, the tool can also be used to make any Wireshark anonymous: we can overwrite any customer IP address with a unique (dummy) 10.x.x.x IP address.
If needed, we can easily anonymize other protocols.
We would be delighted in case you would try out our tool.
We support Windows OS + Linux OS + macOS.
Also merging, splitting, filtering and auditing of Wireshark captures we do support.
Just send us a mail for a free license.
Looking forward for your feedback.
The VoIP Analyzer Team
https://www.voipanalyzertool.com