Wireshark File Storage
Sometimes it is important to know how Wireshark captures packets, and when it is writing them to disk. One of the common questions is “how can I avoid writing packets to disk, and just capture them in memory?”.
Wireshark and dumpcap.exe
One of the concepts of capturing with Wireshark is that Wireshark does not capture packets. A lot of readers will now think “wait a minute, I know for sure that I have captured tons of packets with Wireshark!”, and I have to admit that it’s not that far from the truth. If we look at Wireshark as a tool package it is able to capture packets, but if you look at the Wireshark executable, it isn’t. Instead, it calls dumpcap.exe whenever you start a capture, and reads the file written by dumpcap. If you monitor your process list, e.g. with Process Explorer on Windows, you can see what happens if you start a capture: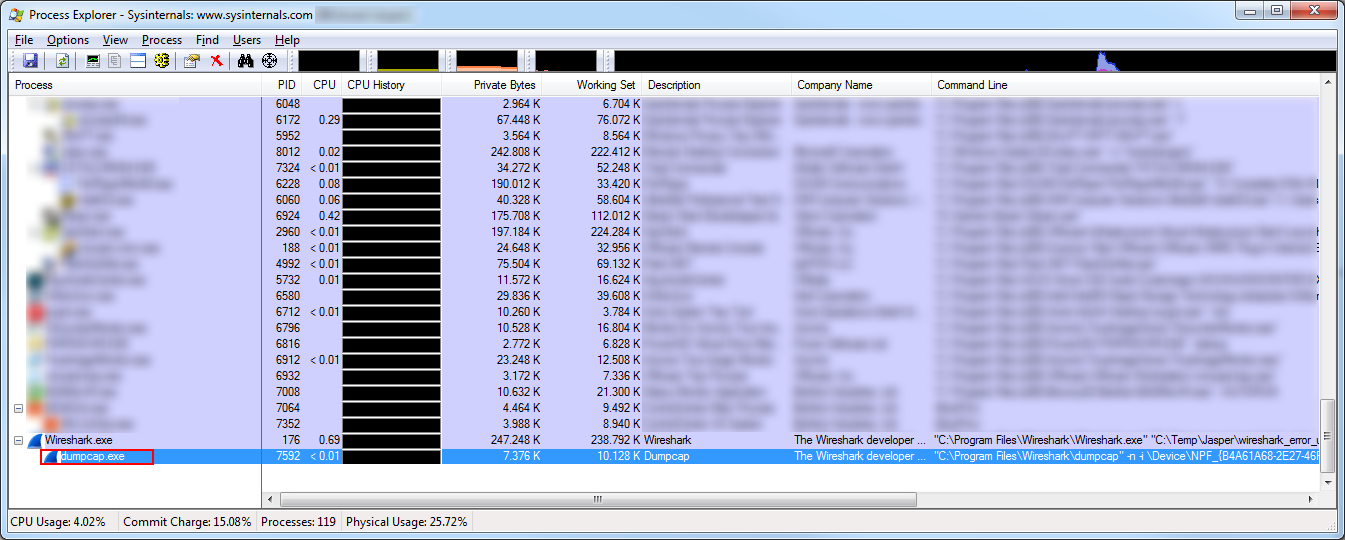
In fact, Wireshark creates a dumpcap process and passes it the parameters for the capture. As soon as the capture is running, dumpcap informs Wireshark whenever there are new packets written to the file. That way Wireshark knows when to re-read the file to display the current list of packets. I already wrote an article about using dumpcap to avoid memory problems here.
Alright, we have established that Wireshark does not capture packets itself, it’s using dumpcap. If you think about it for a moment you’ll probaby realize that if Wireshark is reading packets that dumpcap captured that there is no way around writing them to disk first. As far as I know there is no way for dumpcap to pass packets in memory to the Wireshark process, especially since Wireshark keeps rereading packets on display all the time. So the answer to the question “how can I avoid writing packets to disk when capturing” is pretty simple: you can’t (unless you create a RAM disk, of course 🙂 )
Some may argue that there is a buffer setting in the capture settings, so it must be possible to capture to memory, right?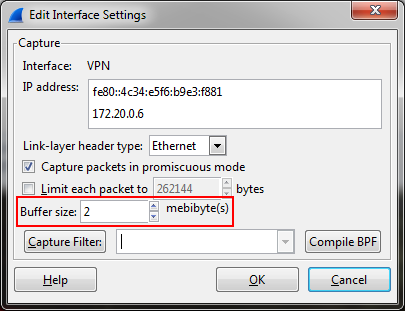
Yes, you can increase that from the default 1 or 2 mebibytes (mebibytes still sounds really strange to me, but anyway), but this will only delay the writing process. If you increase the buffer to huge numbers the incoming packets are written as soon as the buffer fills, so Wireshark will see them later – because they are only read from disk after they have been dumped from memory. This also has the funny effect that when you stop the capture you’ll still see tons of packets coming in (sometimes for minutes, depending on your buffer size), because dumpcap is still writing them from buffer and Wireshark keeps reading the new arrivals. I always keep my buffer settings set to default, to avoid trouble like that.
Location of files
Now where does dumpcap write the packets if you just run a capture, either from within Wireshark, or on a command line? Let’s take a look at a simple capture started by Wireshark first: 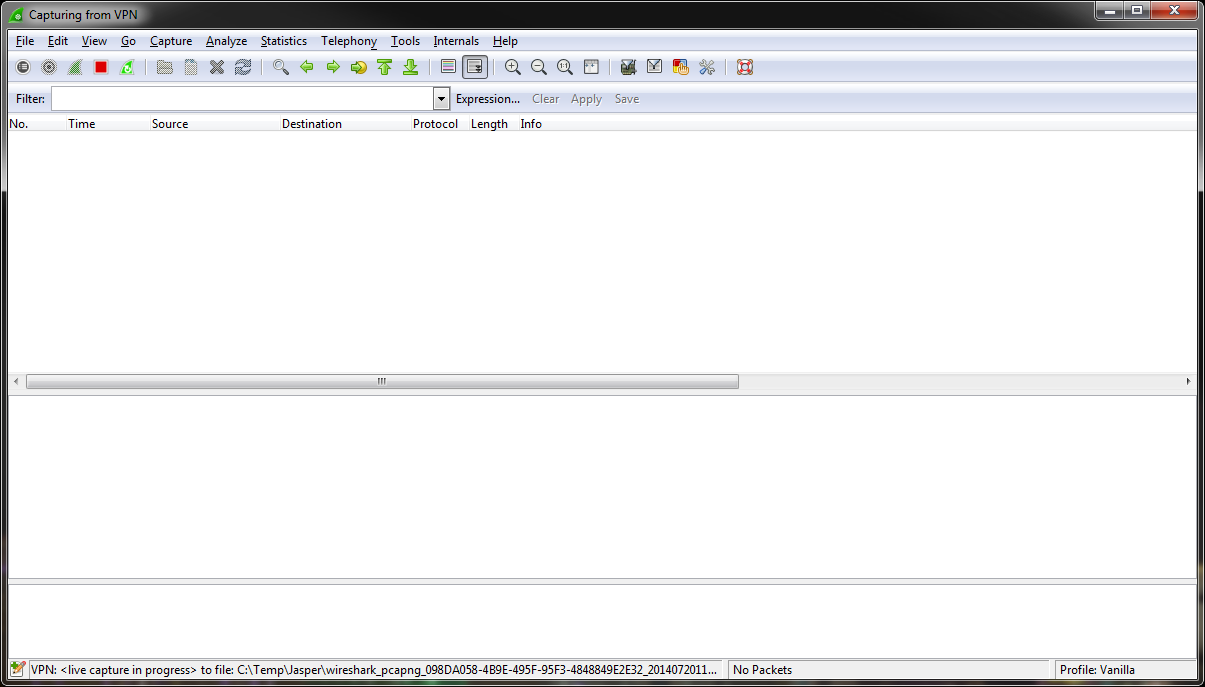
If you take a closer look to the status bar you’ll see that Wireshark is writing a to a temporary path and a temporary file name (“C:\Temp\Jasper\” in my case). Dumpcap does the same, which should come as no surprise by now – the path you see in the GUI is the one dumpcap uses and reports back to Wireshark:
So unless you specify a distinct file name and path when starting the capture your packets will be written to whatever path your temp variable points to. This is important because by default the temp path points to a place on the system disk (at least for Windows), and it is quite common that that disk is not as big as the second disk in the system. So maybe you don’t want Wireshark/dumpcap to write to that place.
Solution 1: changing the temp path
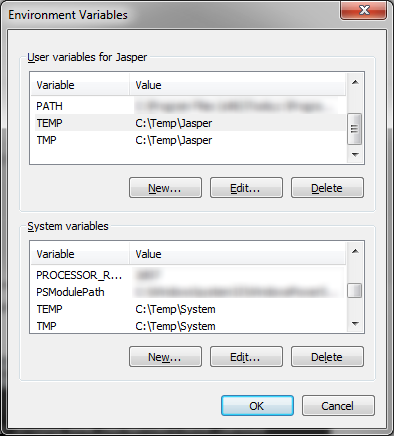
The first thing you can do is change the temporary path. Windows has two settings for this, because each user has its own a temp path, and the system has another. You can find them in the advanced system settings, e.g for Windows 7: Start -> Control Panel -> System and Security -> System -> Advanced System Settings -> Environment Variables. Mine look like this:
Usually, they point to different places in the user folder and the Windows system folder, but I already changed them. So if you want to move your temp folder, just edit the user variables (the ones in the list at the top of the window) and you’re done. It’s a good idea to clean up/move the old folder contents to the new one. Some of the files in the old folder may not be accessible because they’re currently locked.
Solution 2: using a temporary temp path
This may sound a bit funny, because the temp path is already used for temporary files, but how about having a temporary temp path for temporary files? This is often helpful if you don’t want to change your temp path for all temporary files, because Windows is using that path, too. E.g. when your system disk is a fast SSD, but it’s small and does not have room for large captures, but you still want to store the usually small temp files there? How can you make sure Wireshark/dumpcap store their temporary files somewhere else?
There’s a little trick I use in those cases: instead of starting Wireshark right away I create a little batch script that changes the temp path variable and only then runs Wireshark. Since that kind of change to the temp path variables is only valid in the current session it will not affect the system setting. This is how the batch file looks like:
@echo off
SET TEMP=D:\Temp
SET TMP=D:\Temp
"c:\program files\wireshark\wireshark.exe"
Of course you’ll have to adjust the temporary path values as well as the directory where the Wireshark executable is located.
Verifying the temp path setting
If you want to verify what your temp path is set to you can run the “set” command in a command prompt, which will give you something like this:
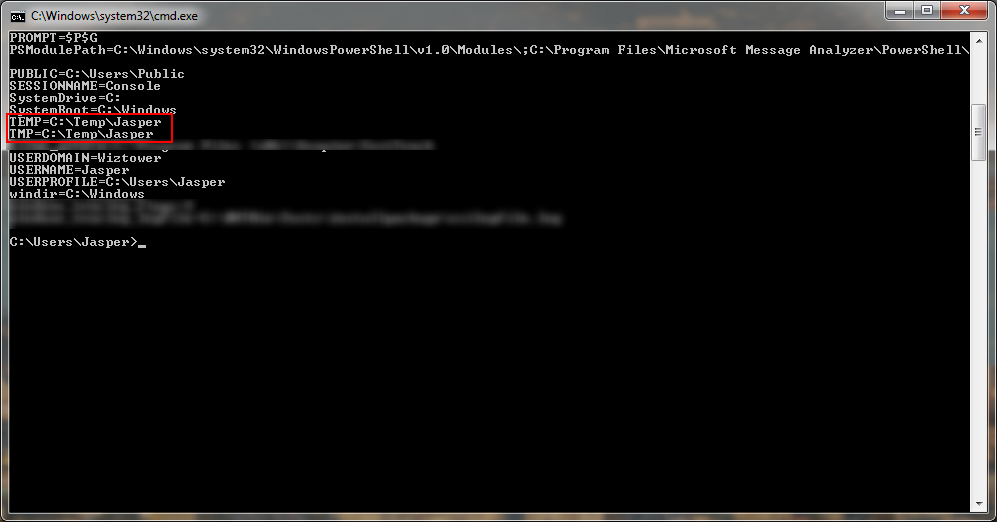
Keep in mind that that setting is for the active user, so if you run any captures from task scheduler you need to make sure that the user owning the task has the correct setting.
Recovering files from a crash
If Wireshark crashed during capture you can still salvage/recover the temporary capture file, if you know where your temporary path points to (if you don’t, run a command line and use the “set” command to get a list of all settings). Just look for the latest pcap/pcapng file in that directory and you should be able to copy the file to a better location, using a name of your choice.

Great article. Any idea on how to force dumpcap to create the directory before it writes in it? I am trying to capture packets for a few months, and have a batch file that writes based on the year/month/day/hour, but unfortunately dumpcap doesn’t try and create the directory if it is not there.
Any suggestions?
dumpcap -i 2 -b duration:3600 -P -w D:\pcaps\%year%\%month%\%day%\%HH24%\capture -q
Thank you.
I don’t think that that kind of functionality has been coded into dumpcap. You’ll probably have to code that functionality into your batch somehow, but I have to admit I never tried that myself before.
I know this is ancient, I just wanted to put this here for posterity:
Within batch, you can use partial data from variables, such as time by adding the following
:~#S,#N
Where #S = Number of characters to skip | #N = how many characters to get
So, if we put | %time:~0,2% | (without lines) into a batch script, it will output the current hour.
To do what Khan wants, you’d use the following:
dumpcap -i 2 -b duration:3600 -P -w D:\pcaps\%date:~10,4%\%date:~7,2%\%date:~4,2%\%time:~0,2%\capture -q
Just as a proof of concept, I ran the following in a command prompt just now:
C:\Users\SysAdmin>echo %date:~10,4%\%date:~7,2%\%date:~4,2%\%time:~0,2%\
Which gave me
2016\17\02\11\
Still a useful and relevant article
On Linux, environment variable TEMP used to be respected. in 3.x wireshark In 4.x wireshark, set TMPDIR.